How to Create a Verge Wallet | Step-by-step Guide

Create your own Verge wallet in just 4 easy steps on Guarda — the world’s leading provider of non-custodial cryptocurrency wallets. In this comprehensive guide, we’ll explain to you how to set up a wallet step by step.
What is Verge crypto?

Though Verge appeared as one of the latest cryptocurrencies on the market, from the very beginning, it had a strong upward trend in value due to the profitable partnerships (with Pornhub, for instance) accompanied by a strong presence in the media and even some sort of speculations. Like many other cryptocurrencies, Verge is focused on decentralization and privacy, that is why XVG token is often called a privacy coin. Founded in 2014 as an open-source project with an international development team, Verge gives users the option of hiding their transactions. It leverages the Wraith Protocol that allows obfuscating the IP addresses of users with Tor and making it difficult to determine the users’ geolocation.
The main goal of Verge is to improve the old blockchain technology that Bitcoin was founded on by creating a truly private payment method for daily use. The collaboration with Pornhub demonstrates that it’s real — Verge successfully serves as a means of payment on the adult entertainment website raising not only the community but also a good sum of money.
Verge (XVG) price on CoinMarketCap.
How to store Verge?
Since Verge can be bought on all major exchanges such as Binance, Bittrex and Changelly, it can even be stored directly in their built-in wallets. Nevertheless, an experienced cryptocurrency holder would always choose to create a separate wallet in order to ensure the safety of the funds. But then he inevitably faces a difficult choice between various cryptocurrency storages presented on the market. The Guarda team conducted a research in the field and prepared for you a helpful check-list. Follow the points below to make the right decision.
Security above all
Speaking of crypto storages, we’d like to start with the vital criterion — security. Multiple useful features of the wallet won’t do any good if the funds are stored not safe enough. Generally, we recommend looking for a custody-free wallet. In comparison to custodial wallets, non-custodial ones are much more reliable. They reduce the risks of losing money and never keep or share with any third-party services the user’s personal data or private keys. Thus, getting one of them you’ll be completely in charge of the crypto assets and backups.
Update history is important
When it comes to financial instruments and services, it should be clear for you: permanent development means security. You trust the wallet with your money and if you’re not ready to lose it, look for a gradually evolving product. Development teams always announce their wallets’ updates, bug fixes and new features. Look through the wallet official website, networking pages and community chats to understand the situation. The long silence is definitely a bad sign. Go for another variant in this case.
Wallet reviews check
Sometimes user feedback can be really helpful not only for evaluating the wallet’s trustworthiness but also for better understanding its special features. Go to the dedicated pages of App Store and Google Play if you’re looking for a mobile application or visit specialized review platforms like Trustpilot and CryptoCompare. It’s definitely better to know all the drawbacks and pitfalls beforehand.
While exploring the users’ comments, pay attention also to the developer’s activity. If you’re about to get a wallet but its representatives don’t consider it necessary to answer the questions and claims, better change your mind.
Wallet community calling
Think of it as a source of information rather than a social club. Cryptocurrency communities are especially helpful to novices who suffer from a vast amount of information floating around. Experienced community members, in their turn, know the answers to most of the questions concerning the wallet, its features and operations with crypto. They can teach you to navigate in this sea, tell decent projects from scams and manage your money wisely. Check Twitter, Facebook, Telegram, Reddit, Discord, Steemit and GitHub in order to find like-minded people among crypto enthusiasts.
The first try
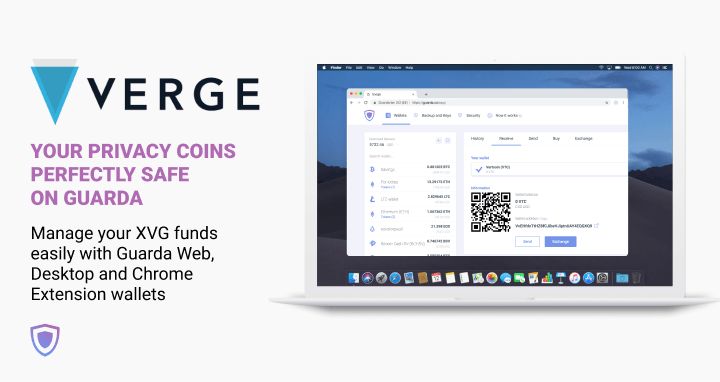
If you followed all the recommendations given above and finally made up your mind, it’s time to give a try to the chosen wallet. Guarda Wallet meets all the listed requirements and supports Verge on multiple platforms: web, desktop (Windows, Linux, MacOS) and Chrome extension. In the next paragraph, we will explain to you how to set up a Verge wallet in just a few easy steps on Guarda.
Create a Verge (XVG) wallet by following these 4 steps:
- Go to Guarda Wallet website and click “Create Wallet” on the main page;
- Think of a strong password for your wallet;
- Download the backup file and store it in a secure place;
- Your Verge wallet has just been created!
Step 1. The button you need is situated in the upper right corner of the Guarda Wallet website. Once you’ll click it, you’ll be redirected to the welcome screen. Choose to create a new wallet again in order to proceed. If you would like to find some extra information on the Waves wallet you’re about to create, please, check the Web Wallet page.
Step 2. Making up a strong password for your new Verge wallet is crucial. To protect your crypto assets well, try not to repeat the same password you already use for some other services. Choose a combination of upper/lowercase letters, numbers and symbols. You can find some helpful information on cryptocurrency wallet passwords in our guide.
Step 3. Downloading your backup and finding a secure place to keep it in is extremely important. You can only log into your Verge wallet with a combination of Guarda wallet backup and the wallet password. As we already mentioned, all Guarda wallets are non-custodial. Hence, the company doesn’t store your backups and cannot access them. Due to this, we won’t be able to restore them in case of loss. Please, make sure to save your backup file and never share it with anyone.
Step 4. Your new wallet for Verge is all set up! Now you can store and manage XVG safely and smoothly with all the features that the Guarda team has prepared for you. Enjoy!
